Maintaining and improving a home is one of the most significant investments you will ever make. Beyond keeping a roof over your head, strategic updates protect your property value, dramatically reduce monthly utility bills, and prevent costly structural failures before they happen. However, navigating the world of home repairs, material choices, and specialty trade services can quickly become overwhelming. Many homeowners find themselves caught between doing everything themselves to save money or paying top dollar for every minor fix.
The key to smart home ownership lies in taking a proactive, high-ROI approach. By learning high-impact maintenance techniques, knowing which materials deliver the best longevity, and understanding when to call in specialized trade professionals, you can keep your living space running safely and efficiently. Whether you are looking to boost your interior layout, expand your outdoor living area, or harden your home’s main operational systems against harsh weather, this comprehensive guide delivers actionable strategies to elevate your home across ten distinct functional areas.
1. HVAC Maintenance & System Efficiency
Your home’s heating and cooling systems are responsible for nearly half of your overall monthly utility expenditure. Keeping these units operating at peak thermal efficiency requires regular, low-cost maintenance habits rather than waiting for an unexpected mid-season breakdown. Start by performing a seasonal visual audit of your home’s air ductwork and thermal envelope.
-
Perform the Dollar-Bill Draft Test: Check window frames, exterior door thresholds, and attic access panels for seal failure. Close a door or window on a dollar bill; if you can slide it out easily without resistance, your weatherstripping is compromised and letting conditioned air leak out.
-
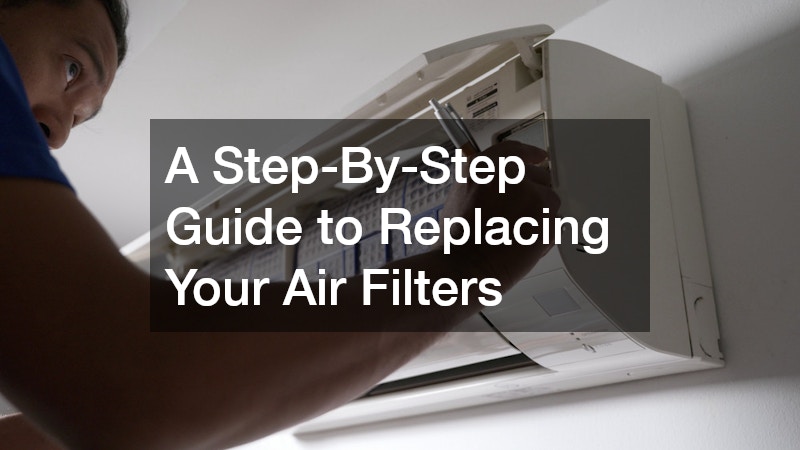
Establish a Filter Rotation Schedule: Swap out standard pleated filters every 60 to 90 days. If you have pets or live in a dusty region, reduce this interval to every 30 days. Clogged filters force your system’s blower motor to work harder, increasing energy consumption by up to 15 percent.
-
Clear Outdoor Condenser Units: Keep at least two feet of clearance around exterior condenser coils. Brush away leaves, grass clippings, and dirt, and gently straighten bent cooling fins with a fin comb to maintain maximum air flow.
-
Install Smart Thermostats with Multi-Zone Control: Upgrade from basic manual thermostats to programmable smart models. Setting back temperature schedules while you are at work or sleeping reduces annual heating and cooling expenses by up to 10 percent.
While basic routine maintenance like swapping air filters, washing fan blades, and clearing surrounding yard debris can easily be done by any homeowner, a major system tune-up requires specialized technical diagnostic equipment. Having certified hvac companies conduct semi-annual inspections ensures that refrigerant levels, electrical connections, compressor amps, and heat exchangers are thoroughly evaluated. Furthermore, partnering with an experienced air conditioning company before the summer heat hits allows you to catch minor capacitor or motor failures before they turn into emergency system replacements during a heatwave.
2. Roofing & Exterior Shell Protection
Your home’s exterior shell—the roof, gutters, and perimeter drainage—is your first line of defense against severe storm damage and structural deterioration. Water is a home’s worst enemy; once moisture infiltrates the attic or foundation walls, it creates wood rot, mold growth, and severe foundation shifts.
Preventative maintenance starts high above your head. Perform biannual roof audits using a high-powered pair of binoculars from ground level or by taking high-resolution photos with a camera or drone. Look specifically for missing shingles, lifted flashing around chimneys, or cracked rubber boots around vent pipes.
-
Extend Downspouts Away From Foundations: Ensure all gutter downspouts terminate at least 5 feet—ideally 10 feet—away from your foundation walls. Use rigid plastic extensions or buried smooth-pipe pop-up emitters to prevent groundwater pooling near basement footings.
-
Clean and Flush Gutter Channels: Clear leaves, twigs, and sediment buildup from your gutters every spring and fall. After removing large debris, flush the gutters with a high-pressure hose to verify that water flows freely toward the downspouts without overflowing the front lip.
-
Maintain Attic Ventilation Pathways: Ensure soffit vents are free of loose blown-in attic insulation or bird nests. Balanced airflow between your intake soffit vents and exhaust ridge vents prevents excessive attic heat buildup in summer and costly ice dam formation in winter.
When inspectable roof damage is caught early, simple tile resets or pipe boot replacements can extend the life of your roof by several years. However, when dealing with extensive storm damage, aging shingle wear, or underlying deck rot, hiring professional roofing contractors is critical. Licensed experts possess the proper safety rigging, underlayment materials, and installation warranties required to keep your upper structure completely watertight.
3. Countertop Selection & Kitchen Surface Care
Gutting a kitchen or primary bathroom can cost tens of thousands of dollars, making total room overhauls impractical for many homeowners. Fortunately, you can achieve a luxury finish at a fraction of the cost by focusing on high-visibility surface upgrades.
Instead of ripping out custom solid-wood cabinet boxes, consider refinishing the existing framework. Removing cabinet doors, sanding down surface finishes, applying a stain-blocking primer, and applying two coats of durable cabinet-grade enamel paint transforms the entire aesthetic of your kitchen. Replacing outdated brass hardware with modern brushed nickel, matte black, or warm brass pulls completes the transformation.
When upgrading worn-out laminate or damaged kitchen tops, material choice dictates long-term durability and maintenance effort:
-
Select Composite Quartz over Marble: While natural marble is beautiful, it is soft and porous, making it susceptible to acid etching from citrus juices and staining from wine or coffee. Engineered quartz offers superior scratch and stain resistance without requiring routine sealing.
-
Apply High-Grade Sealants to Natural Stone: If you have existing granite surfaces, apply a fluoropolymer-based impregnating sealer once a year. Test your seal by dropping a few droplets of water on the surface; if the water beads up, your surface is protected; if it absorbs into the stone within 5 minutes, reapplication is necessary.
-
Protect Sink Cutout Edges: Silicone seals around kitchen sink drop-ins deteriorate over time. Remove old, mildewed caulk annually, clean the gap with rubbing alcohol, and reapply 100% waterproof silicone to prevent subsurface water damage.
For seamless kitchen transformations, consulting with qualified countertop contractors ensures precise laser-measuring, custom edge profiling, and chip-free installation around undermount sinks and cooktops.
4. Plumbing Systems & Moisture Control

Plumbing failures rank among the most expensive home insurance claims. Small, undetected leaks inside cabinet bases or behind walls lead to structural decay, ruined subflooring, and black mold.
-
Install Smart Leak Detection Valves: Mount wireless, battery-operated water sensors beneath every sink cabinet, behind washing machines, and next to water heaters. Paired with a smart shutoff valve at your main line, these systems automatically cut off the water supply the second a leak is detected, saving thousands of dollars in emergency restoration costs.
-
Flush Tankless and Tank Water Heaters Annually: Flush sediment accumulation out of your tanked water heater annually to prevent heating element burnout. For tankless units, circulate a food-grade vinegar solution through the heat exchanger for 45 minutes using a small submersible pump to remove calcium scale buildup.
-
Retrofit High-Efficiency Aerators: Swap out standard fixture aerators for low-flow, high-pressure models (1.2 to 1.5 GPM). This simple upgrade cuts hot water usage by up to 30 percent while maintaining comfortable spray pressure.
While minor tasks like swapping out sink aerators, clearing shower drain traps, or changing flappers inside toilet tanks make great weekend DIY projects, main supply lines require a heavier touch. Entrusting major valve replacements, gas line tie-ins, and drain line hydro-jetting to a licensed plumber guarantees that your home’s water and waste infrastructure meets local safety and building codes.
5. Paving Maintenance & Hardscape Restoration
Your driveway and front walkways make up the majority of your home’s exterior entryway. Neglecting hardscape surfaces allows minor cracks to expand, leading to complete pavement failure that requires expensive excavation and repaving.
Asphalt and concrete undergo significant thermal expansion and contraction during winter freeze-thaw cycles. When water penetrates hairline fractures in asphalt, it expands as it freezes, breaking down the sub-base gravel below.
-
Fill Hairline Cracks Early: Use a high-performance rubberized cold-pour crack filler for asphalt or an elastomeric polyurethane sealant for concrete. Clean out all dust, weed roots, and loose gravel with a wire brush and pressure washer before applying the filler.
-
Apply Acrylic Sealer Every 2 to 3 Years: Protect asphalt driveways from oil drips, UV degradation, and water intrusion by applying a coal-tar-free commercial acrylic sealer using a heavy-duty squeegee.
-
Lock Paver Joints with Polymeric Sand: If your walkways consist of concrete pavers, sweep polymeric sand into the joint gaps, brush off excess surface residue, and mist lightly with water. The sand hardens into a flexible lock, stopping weed growth and ant colonization.
When asphalt surfaces suffer from deep fatigue cracking, widespread potholing, or grade depression that causes standing water near your house, DIY solutions are no longer sufficient. Hiring local paving services allows you to repair the underlying aggregate base, install structural asphalt overlays, or grade proper runoff drainage across your property.
6. Soil Optimization & Lawn Mechanics
A lush lawn and thriving landscape garden do not happen by accident; they are built on healthy soil foundation physics. Many homeowners waste hundreds of dollars on premium grass seed, shrubs, and fertilizers without first evaluating the structural composition and chemistry of their lawn.
-
Conduct a Professional Soil Test: Before planting or applying fertilizers, submit a soil sample to your local university extension service. Testing reveals the exact soil pH, nitrogen, phosphorus, and organic matter content, preventing over-fertilization and nutrient run-off.
-
Aerate Compacted Lawn Areas: High foot traffic compacts soil, preventing oxygen, water, and root growth. Use a core aerator in early fall to pull 2- to 3-inch soil plugs out of the turf, opening up pathways for root expansion.
-
Grade Edges for Runoff Management: Keep flower bed soil lines at least 2 inches below hardscape walkways and foundation siding to prevent mulch washout and insect bridging into your home.
When topdressing depleted lawns, leveling yard depressions, or installing new planting beds, volume estimation is critical. Measure your lawn’s square footage and calculate exact cubic yard requirements by multiplying length by width by depth and dividing by 27. Ordering bulk top soil deliveries directly to your driveway saves significant money compared to buying individual plastic bags at home improvement centers, providing the organic rich material needed to revitalize your yard.
7. Fence Upgrades & Boundary Protection

A well-designed boundary fence adds immediate curb appeal, secures pets and children, and creates private outdoor living zones. However, fences take a heavy beating from high winds, ground moisture, and insect damage.
-
Set Posts Below the Frost Line: The single most common cause of fence failure is shallow post placement. Ground posts must be set in concrete at a depth below your local frost line (typically 36 to 48 inches in colder regions) to prevent frost-heaving during winter.
-
Stain and Seal Pressure-Treated Wood: Pressure-treated lumber is resistant to rot, but it will warp, twist, and split if left exposed to sun and rain. Allow new wood to dry out for 30 to 60 days until water drops sink in rather than bead up, then apply a high-penetration oil-based exterior stain.
-
Install Concrete Kick Boards or Sleeves: Protect the bottom edge of wooden fence pickets from rot by keeping them at least 2 inches above bare soil. Use rot-resistant composite boards or concrete gravel boards along the ground line to act as a barrier against weed trimmers and damp soil contact.
When enclosing large acreage, navigating challenging slope grades, or installing heavy custom structural materials, hiring an experienced fencing professional saves time and guarantees structural stability against heavy wind loads.
8. Pool Maintenance & Water Management
Outdoor water features and swimming pools provide exceptional summer relaxation, but improper maintenance leads to high power bills, chemical imbalances, and costly equipment replacements.
-
Switch to Variable-Speed Pump Motors: Traditional single-speed pool pumps run at high RPMs continuously, drawing massive amounts of electricity. Replacing an outdated pump with a variable-speed motor lets you run circulation at low speeds for longer periods, cutting filtration electricity costs by up to 70 percent.
-
Automate Sanitization with Salt-Chlorine Generators: Converting traditional liquid or tablet chlorine systems to salt-water chlorination systems maintains consistent sanitizer levels without causing eye irritation, harsh chemical smells, or bleaching.
-
Deploy Thermal Covers to Cut Evaporation: Uncovered pools lose heat and water continuously through evaporation. Using a thermal bubble cover when the pool is not in use traps water vapor, reduces heating energy costs by 50 percent, and minimizes chemical loss from sun exposure.
While daily water skimming, basket cleaning, and simple water testing strips are easily handled by homeowners, complex mechanical maintenance requires specialized care. Partnering with a reliable pool company for seasonal openings, closings, plaster resurfacing, and salt-cell maintenance protects your water feature investment and keeps pump systems operating reliably for years to come.
9. Flooring Choices & Subfloor Mechanics
Flooring sets the architectural tone for your entire home interior while enduring heavy foot traffic, pet nails, and furniture movement. Choosing the right material for each room saves thousands in maintenance and replacement costs over time.
When upgrading worn carpeting or outdated vinyl, evaluate the environmental demands of each space:
-
Opt for Luxury Vinyl Plank (LVP) in High-Moisture Areas: Basements, mudrooms, kitchens, and bathrooms are susceptible to water spills and humidity fluctuations. LVP features a rigid stone-plastic composite (SPC) core that is 100 percent waterproof and will not buckle, expand, or cup like natural hardwood when exposed to moisture.
-
Look for Thick Wear Layers: When buying resilient vinyl or laminate floors, select products with a wear layer of at least 20 mil (0.5 mm) for residential homes with pets and kids. Thicker wear layers resist scratches, scuffs, and gouges far longer than builder-grade 6-mil options.
-
Acclimate Wood Materials Prior to Installation: Never install hardwood or laminate directly off the delivery truck. Unbox the planks and let them acclimate inside the installation room for 48 to 72 hours so they adjust to the room’s ambient temperature and relative humidity levels, preventing post-installation warping or gapping.
-
Protect Surfaces with Heavy-Duty Felt Pads: Attach thick, high-density felt pads to the bottom of all chair legs, table feet, and heavy furniture. Clean dust and grit off these pads regularly to prevent sand particles from acting like sandpaper against your floor’s clear coat finish.
Installing floating floors in simple rectangular bedrooms is a manageable DIY project. However, laying continuous hardwood, levelling irregular subfloors, or setting intricate tile patterns across large areas requires specialized expertise. Hiring seasoned flooring contractors ensures seamless transitions, flat subfloor preparation, precise underlayment installation, and custom trim integration throughout your home.
10. Insulation & Thermal Envelope Efficiency

An often overlooked aspect of home maintenance is the efficiency of the thermal envelope. Heat naturally flows from warmer areas to cooler areas, meaning that during winter, heat escapes upward through the attic, while in summer, outdoor heat penetrates downward into living spaces.
Maintaining proper thermal boundaries protects your home from unnecessary heating and cooling strain while stabilizing interior humidity levels.
-
Air Seal the Attic Floor: Before adding insulation, seal all air leaks between the living space and the attic using expanding foam or caulk. Pay special attention to cutouts around recessed lights, plumbing stacks, electrical wiring penetrations, and the attic hatch.
-
Top Up Attic Blown-In Insulation: Check the depth of your attic insulation. In most temperate climates, attic insulation should reach an R-value between R-38 and R-60 (typically 12 to 19 inches of blown fiberglass or cellulose). Adding a fresh layer eliminates cold spots and drafty rooms upstairs.
-
Insulate Rim Joists in Basements and Crawlspaces: Uninsulated rim joists along basement perimeter walls account for significant heat loss and cold floors on the first story. Spraying closed-cell polyurethane foam along rim joist bays creates a continuous vapor seal that stops drafts and keeps moisture out.
Taking the time to air seal and insulate your home’s thermal boundaries ensures that every mechanical upgrade you make inside yields the highest possible return on comfort and energy savings.
Taking a strategic approach to home improvement allows you to protect your property investment, optimize energy efficiency, and build an enjoyable living environment for your family. By balancing straightforward DIY preventative maintenance—like sealing drafts, flushing water systems, cleaning gutters, and applying surface sealants—with timely specialized trade repairs, you can maintain every major system in your home with complete confidence.
The key to long-term success is consistency rather than trying to tackle every project at once. Pick one high-ROI project from this guide to focus on this month, build out a seasonal home maintenance checklist, and reach out to qualified trade professionals when projects require specialized diagnostic tools or heavy-equipment installation. With the right strategies in place, your home will remain safe, comfortable, and valuable for decades to come.